
Hello, welcome to my beautiful world! My name is Prisca Bush. I am a food lover; I enjoy writing about my favorite recipes.
Introduction
I still remember the first time I tasted homemade onion rings. It wasn’t at a fancy restaurant or a trendy food truck, but in my grandmother’s small kitchen on a hot summer afternoon. She had a way of turning the simplest ingredients into something unforgettable. The onions came straight from her garden, and the batter was whipped up with a handful of pantry staples. She dipped each onion slice with such care, gently lowering them into the bubbling oil, and the entire kitchen filled with the warm, savory aroma of frying goodness.
When she handed me that first golden ring—crispy on the outside, tender and sweet on the inside—I was hooked. No fast-food chain or diner onion rings could ever compare. Since then, I’ve been chasing that perfect homemade version, one that balances crunch with flavor and keeps you reaching for just one more bite.
This fried homemade onion rings recipe is exactly that—simple, foolproof, and downright delicious. Whether you’re making them as a snack, a party appetizer, or a side dish for burgers, these onion rings will transport you back to that nostalgic moment of biting into something warm, crispy, and comforting.
Do you want more recipes?
Salmon Croquettes Recipe
Loaded Cheese Fries Recipe
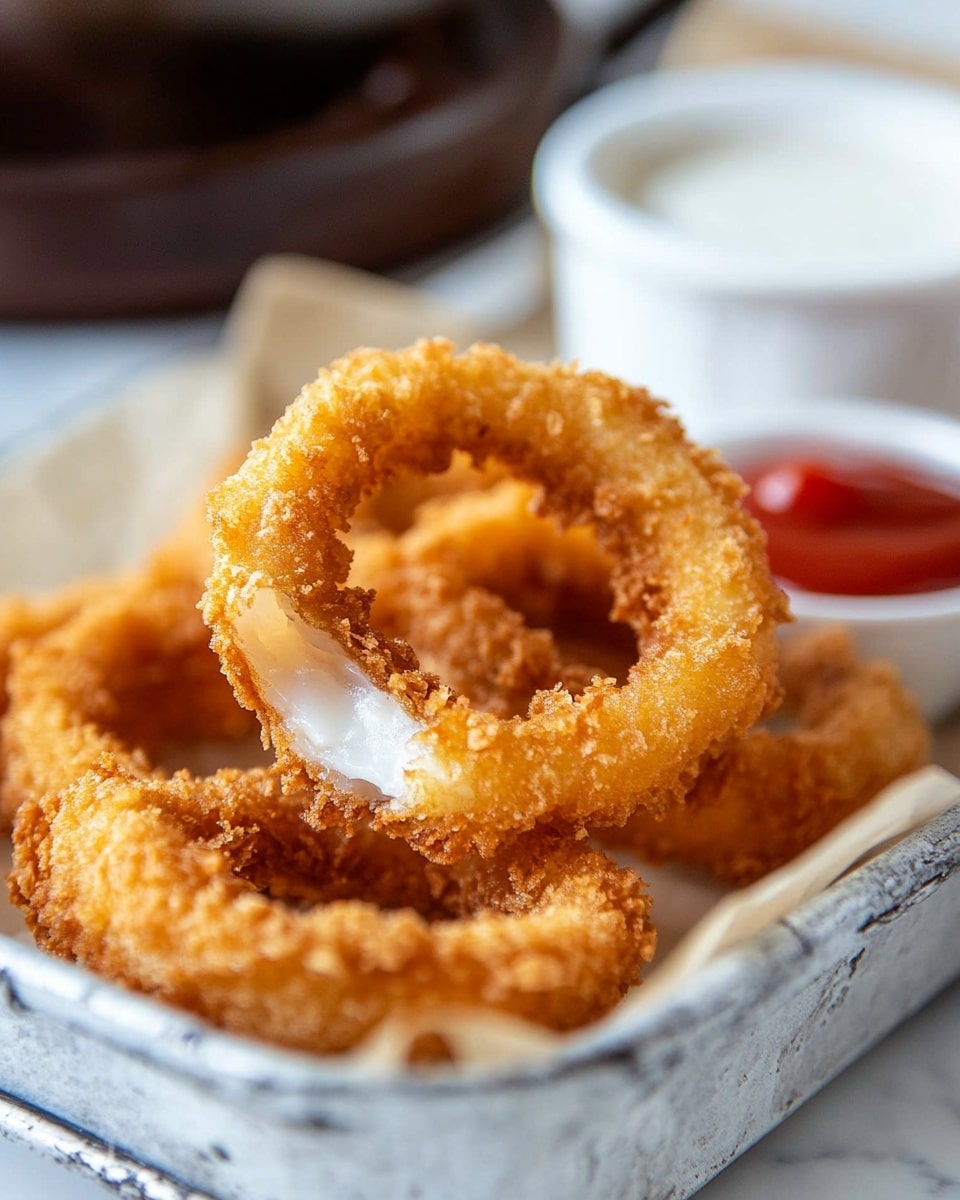
Fried Homemade Onion Rings Recipe (2025)
Ingredients for Fried Homemade Onion Rings
The beauty of onion rings lies in their simplicity. With just a few everyday ingredients, you can create a snack that feels gourmet.
For the Onions
*2 large yellow onions (Vidalia onions work best for sweetness)
*1 cup all-purpose flour (for dredging and batter)
*½ teaspoon salt
*½ teaspoon black pepper
For the Batter
*1 cup all-purpose flour
*1 teaspoon baking powder
*1 teaspoon paprika (adds subtle smokiness)
*1 teaspoon garlic powder
*1 teaspoon onion powder
*1 teaspoon salt
*1 cup buttermilk (or substitute with milk plus 1 teaspoon vinegar)
*1 large egg
For the Coating
- 2 cups breadcrumbs or panko
For Frying
*4 cups vegetable oil (or canola oil, for deep frying)
For Serving
* Ketchup
* Ranch dressing
* Spicy mayo
* Barbecue sauce
How to Prepare
Step 1: Slice the Onions
* Peel the onions and slice them into ½-inch thick rings.
* Gently separate the rings, keeping the larger ones intact for frying.
* Smaller rings can be saved for soups or stir-fries.
Step 2: Set Up the Dredging Station
Prepare three bowls:
1. Flour mixture – mix flour, together with salt and pepper.
2. Batter – whisker flour, baking powder, spices, egg, and buttermilk until smooth.
3. Breadcrumbs – plain or seasoned, depending on preference.
Step 3: Coat the Onion Rings
* Dip each onion ring first into the flour mixture (this helps the batter stick).
* Next, dip into the batter, letting excess drip off.
* Finally, coat with breadcrumbs, pressing lightly so they stick.
* Place coated rings on a tray until ready to fry.
Step 4: Heat the Oil
* In a deep frying pan or Dutch oven, heat oil to 350°F (175°C).
* Use a thermometer for accuracy—if oil is too hot, the coating will burn before the onion cooks; too cool, and the rings will absorb excess oil.
Step 5: Fry the Onion Rings
* Fry in small batches, 4–5 rings at a time, to avoid overcrowding.
* Cook for 2–3 minutes per side, until golden brown.
* Remove with a slotted spoon and drain on paper towels or a wire rack.
Step 6: Serve Hot
* Sprinkle with a little extra salt immediately after frying.
* Serve warm with your favorite dipping sauces.
Step-by-Step Instructions
1. Slice onions into ½-inch rings and separate.
2. Dredge the coat in seasoned flour.
3. Dip and submerge in spiced batter.
4. Coat roll in breadcrumbs.
5. Fry Deep fry at 350°F until golden and crisp.
6. Drain & serve with dips of your choice.
Storage and Reheating Tips
Onion rings are best eaten fresh, but you can still enjoy them later with the right storage methods.
Storing Leftovers
* Refrigerator: Place cooled onion rings in an airtight container lined with paper towels. Store for up to 2 days.
* Freezer: Arrange onion rings in a single layer on a baking sheet, freeze until solid, then transfer to a freezer-safe bag. Store up to 1 month.
Reheating
Oven: Reheat at 375°F (190°C) for 10–12 minutes. This restores crispiness.
Air Fryer: Reheat at 350°F (175°C) for 4–6 minutes.
Microwave: Not recommended, as it makes onion rings soggy.
Make-Ahead Tip
You can prepare the coated onion rings ahead of time, freeze them raw, and fry directly from frozen when ready. Just add 1–2 minutes to the frying time.
Variations of Homemade Onion Rings
One of the best things about onion rings is how adaptable they are. Try these fun twists:
1. Beer-Battered Onion Rings – Replace buttermilk with cold beer in the batter for extra flavor and a light, airy crunch.
2. Spicy Onion Rings – Add cayenne pepper or chili powder to the batter for a fiery kick.
3. Cheesy Onion Rings – Sprinkle parmesan into the breadcrumb coating for a cheesy crust.
4. Gluten-Free Onion Rings – Use gluten-free flour and gluten-free breadcrumbs.
5. Baked Onion Rings – For a lighter option, bake coated rings at 425°F (220°C) for 18–20 minutes, flipping halfway.
—
Serving Suggestions
Onion rings aren’t just a snack—they can elevate an entire meal. Here are some delicious ways to serve them:
* As a side dish with burgers, fried chicken, or steak.
* As a party appetizer, served with multiple dips.
* As a topping for sandwiches or hot dogs.
* In a loaded platter, paired with fries, mozzarella sticks, and chicken tenders.
Nutritional Snapshot
Onion rings are indulgent, but they offer some surprising nutritional perks too:
Onions are rich in antioxidants and vitamin C.
Batter and breadcrumbs provide energy through carbs.
Frying does add fat, but baking or air frying offers a lighter alternative.
For a healthier version, bake the onion rings or try using an air fryer.
Troubleshooting Common Issues
If your first batch doesn’t come out perfect, here are some quick fixes:
1. Soggy onion rings oil wasn’t hot enough. Always fry at 350°F.
2. Batter not sticking: Onions might be too wet. Pat them dry before coating.
3. Too greasy: Overcrowding the pan lowers oil temperature. Fry in batches.
4. Bland flavor: Don’t skimp on seasoning—add spices to flour, batter, and breadcrumbs.
Final Thoughts
There’s something undeniably satisfying about biting into a perfectly fried onion ring—crispy on the outside, tender and slightly sweet on the inside. This homemade onion rings recipe delivers everything you love about diner-style onion rings, but with the comfort of making them right in your kitchen.
From the moment you slice into the onions to the golden finish after frying, the process is straightforward yet rewarding. Best of all, you can tweak the recipe to suit your preferences—whether you prefer spicy, cheesy, or even baked for a lighter twist.
So, the next time you’re craving a crunchy snack or planning a comfort-food feast, skip the frozen bag and try these homemade onion rings instead. They’re nostalgic, customizable, and guaranteed to impress anyone at your table. One bite, and you’ll see why this recipe deserves a permanent spot in your comfort food collection.